|
Intro: I wanted to dedicate a small post about the back of my ATCs. Some artist create their own templates while others download them (there are free templates available online). I created my own quick template using only two programs: I used cooltext.com for generating a simple title and then using MS PowerPoint I put together a template with two variations. Cooltext.com has many fonts and icons available to use for free... so if you want to create your own template from there you can. I have included the MS PowerPoint template at the bottom of this post along with the image version that you can use as well. These are free to use... no credit required. So here is a breakdown of what is included on the back of my artist trading cards... Title - the name of the card (the art itself) Series/Collection - the series or collection that the card is a part of (if any) Date & No. - the date that the art was declared as "complete! no more adjustments" and the number of the card in the series (if it belongs to a series) Artist - the artist's name who created the card (me) Signature - the official signature of the artist (only available on the left template; I left a blank spot for the signature on the right template as my signature actually does not look good on top of a line) Contact - e-mail and/or website... address if you want or even phone number Notes - this small spot could contain notes on the art or even a message to the receiver of the card (I kept this in mind for giving ATCs out as gifts). This could also be used to mention the media of the art. 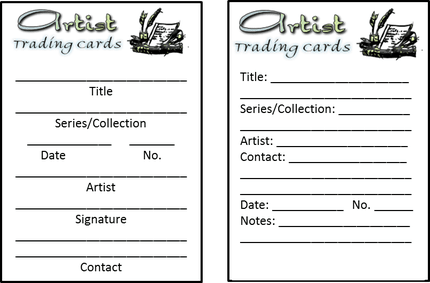 Final thoughts: the cards are actually too small to add anything else and personally I think adding way too much information on the card itself takes away from the guidebook. Having a guidebook is a great tool to get your thoughts flowing as you are not only thinking about what you have created but now you have to put it down in words... writing practice - another form of art.
Feel free to print a copy of the image that I have posted. The black borderline is 2.5" by 3.5" the typical ATC size. When I put these on my cards I cut the borderline away if I am creating curved corners but I keep the borderline if the cards are cut simply. I have already altered this to have a version for participating in swaps to include location and Swap name... so you can alter it too. Some have altered a similar template by adding something fancier at the top instead of the basic title that I have. You can download the MS PowerPointRaw template or printable MS Word document for any of the two templates from this folder: Public Google Drive Folder
0 Comments
Status: For details on this challenge please read this intro post. Status so far on this challenge...You can also view these any of my two galleries with details. Below is what I have created so far since January 01, 2017 for this challenge. 3D works & sewingATCs for TradeATCs for SwapsInchies for SwapsIntro: I discovered an art challenge that happens every year over at ATCsforAll.com. It is the 30 paintings in 30 days challenge created by Leslie Saeta.
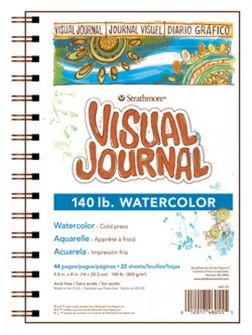
Details: I thought I was too late as it was already January 16th but a fellow artist convinced me to go for it still... maybe go for the 15-in-15-days marathon. There are no rules... you just create every day (but because there are no rules you can actually create every other day as well). Mostly it has been drawings, illustrations, and paintings but some artists have gone beyond to create 3D works and digital works as well. I had already started the year off by running into what now I classify as "small canvases" so a theme had started in a way. My official theme for this challenge is just that: exploring small canvases. I hope to discover new tricks in working with media that I already use by being restricted to the size of the canvas. This is a big deal for me as I tend to go for small details and thus require a bigger canvas to work on. I want to improve my skills enough so that I can create at least 60% of the same amount of details on a 2.5"x3.5" canvas that are on a 18"x24" canvas. With this... I am not limiting myself to just ATCs...I am going to work on inchies, twinchies, in-betweenchies (?)...and artist tiles. Social Status: I have started posting all of my work on DeviantArt now just so that I can have a protected gallery to refer to whenever needed. Protected because of the watermark that is available for any uploads to the website. Other than that... I thought about uploading my creations on Pinterest as well but that website is just too hectic for sharing art. I do try to share the posts that I create on here to Facebook and also on Twitter but there is no real purpose for those except for any followers and friends to know that I am alive still (lol). Final thoughts: I have already added reminders to my calendar for other challenges that I want to participate in... #29faces challenge in February and again in September. There is #inktober in October along with #drawlloweeen... but I am leaning more towards #inktober as I need to practice creating in ink. And yes I have already marked this #30-in-30-days challenge for next year on my calendar as I do want to go for a full month's of creations. I have also been thinking about creating some personal challenges that are spread out during different times of the year (not conflicting with these other challenges). Perhaps ATC related or just any small canvas related challenges... any thoughts or interests? Intro: I purchased a watercolor journal on a whim recently... and I am super excited about filling it up with some nice creativity! It is a bit too large (and heavy) to carry around every where I go with me but I do think I can dedicate some ideas to place in the journal every once in a while.. it'll fill up eventually over time. What I got: I purchased this from a local art store (Allard's) and it is pretty nifty. I admit that I was more intrigued by the cover than anything else... It is not that grand compared to some overly priced journals that can be purchased online but for the price the journal is just amazing. It does have a hardcover front and back with some pattern... which adds a nice touch if you are feeling too lazy to create your own cover. The only reason I am interested in the hard cover is - it acts as a nice canvas for adding my own custom cover. Whether I create the cover in clay then attach after curing or whether I decide to just create the cover with mixed media directly on the journal - either way it has an advantage. The journal I purchased is a Strathmore Visual Journal 140LB Watercolor. Final thoughts: I have already started my first painting in the journal... a portrait which I'll be posting as soon as I am done with it.
Intro: I think it is good to on a routine practice certain techniques especially in mediums that you use most often. So I am going to dedicate time to practicing with Watercolor as it my favorite medium to work with. I wanted to work on some exercises that are perhaps productive but mainly relaxing. The first exercise I focus on is texture... you'll see many posts in the future that cover this exercise in different medium. I'll move onto another one once I feel more confident about creating textures. What I created: So I used this as an excuse to get started on the ATCs that I have discuseed in a past post. I thought it would be a great exercise that is relaxing and productive at the same time. There are many things that could be created while working on an exercise such as booksmarks, gift tags, placeholder cards, greeting cards, etc. I find ATCs are the better ones to work with as they come in handy for personal use and can even be used as gifts. Bookmarks are great as well but too many readers are getting away from traditional books to digital books... so the audience is very limited. Using masking fluid in some of the ATCs as foundation I then used these three main texture techniques: 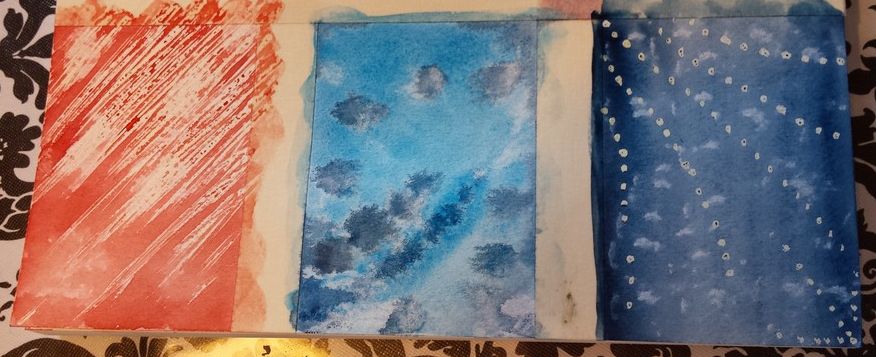 1. The first type of texture I made was using paper towels. There is a bit of variation in texture when you use clear wrap/cling wrap... I tried both just too see how much of a difference there is. 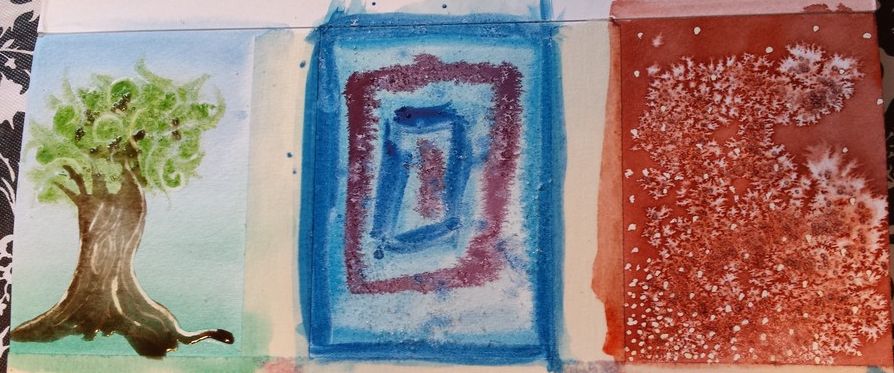 2. Another texture technique I used was done using table salt. This same idea can be completed using sea salt and rice grains to give bigger shapes to the pigment cluster.  3. The last texture type was created using rubbing alcohol. Final touhces were added to the textures once the bookmarks dried using markers and pens. For a cleaner edge you can create a borderline all around the edges using a marker or pen... or even get fancy and use embossing powder. You can purchase stickers online to place on the back of the cards.. or purchase stamps. I just wrote everything by hand using the same felt tip pen I used on the front of the card. I might look into investing in a stamp in the future or create my own as I do have the rubber canvas needed for creating your own stamp. 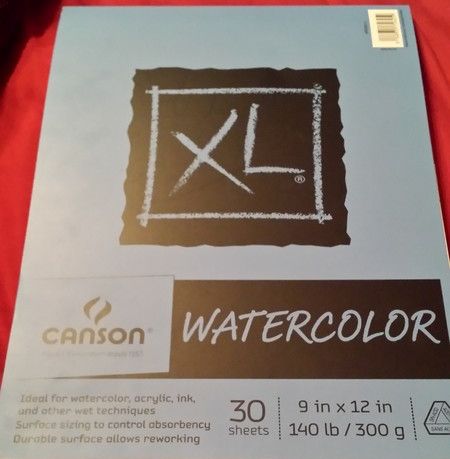 Materials used: I purchased a Canson XL Foldover Watercolor Pad for doing some portraits but decided that I needed a spiral type journal for that. I have instead decided that I am going to use this watercolor pad for creating my ATCs and perhaps other things like tags, bookmarks, cards, etc. I kept the traditional ATC size of 2.5"x3.5" and had a variation in the numbers of cards I got depending on how I divided the page. One way produced only 6 cards...leaving a big chunk of paper at the top that I first thought could be used for bookmarks. Then later I decided to go ahead and divide the page out the opposite way and got 9 cards from the page with zero leftover space. Just enough space is left to allow clean edges to be cut. I used regular masking tape to divide the page into sections. I also used Reeves Watercolor and a mix of Chinese Watercolor when painting this... pretty much whatever happened to be on my pallette already at the time. I also went over the cards (once the paint had dried) using regular sharpie marker (brush tip).
Final thoughts: I do plan on keeping the information section of the cards the same from here on...whether I create them in polymer clay or watercolor. I wanted the back to have detailed information and thus did not purchase the stickers or stamp. Just enough detail for the card on it's own to be informational but not too much so that it looses the interest of the readers if the information is placed inside a guidebook. I think for my first exercise this turned out quite nice...I was expecting more of a disaster. I have decided that it may be time to invest in some better quality watercolor if I am to keep creating watercolor works. Better quality versions of the ATCs can be viewed here: ParadoxSketchbook Gallery at ATCsforAll. I wonder if this same texture exercise can be studied using other mediums...? Intro: I am sure many of us have heard of Omni Journals...or maybe even have one. I decided that it was time to dedicate a notebook/sketchbook as a personal omni journal. What is it? If we look at the definition of "omni" we can easily define the journal itself as well. Omni means "all; of all things; in all ways or places" so just use that definition with a journal. Which in summary means that this journal has no limits like this blog. Mixed media journal, scrapbook journal, paint journal, sketchbook, art book, doodle book, diary...etc any and all of those things combined is an omni journal. You can go from doodling to writing down dreams that you have had... events that have taken places or even put pictures you take in the journal and decorate the page as you would do in a scrapbook. That is why I like the idea of omni journaling - there are no limits... no clear definitions. My omni journal: I decided to keep it small in size as I wanted something that I could easily carry around any where I went... from doctor's office to shopping or work or even dinner at a restaurant. The main purpose was to have a surface to place my thoughts and ideas on and have them be readily available in one location. Previously I have had multiple sketchbooks and journals scattered around: some at work, some at home, some are actually sticky notes laying in the car. I wanted to get rid of the imbalance to get some stress off of my shoulders. Too much stress that is created from materials gets in the way of the actual art from being created. i purchased the Strathmore Sketchbook 300 Series that is 3.5" x 5.0" and has 100 sheets. The other psychological way of looking at this is - the size of the journal that I picked. I think artists (or anyone in general) feels more accomplished when they have smaller tasks that they can check off. Compared to one big task getting completed that takes just so much time to complete in the end it looses it's full apperiation from the creator. By having a journal/sketchbook that is small I want to set myself up for achieving personal goals on completing sketchbooks... something I have never done in my life before. I have countless sketchbooks and journals that are unfinished... some close to finishing but deserted. It's always good to have small motivations in life that keep our inner self pleased because in the end if we are happy with ourselves then we are going to feel better about the things we create. In order to appericiate the works I create more than I currently do I want to show myself that I am capable of accomplishing art related goals. By completing these small journals I hope to achieve this goal... as it is going to help in leading to bigger projects (like the Sketchbook Project). Final thoughts: You'll be seeing actual snippets from my journal in the future categorized under it's own keyword Omni Journal. 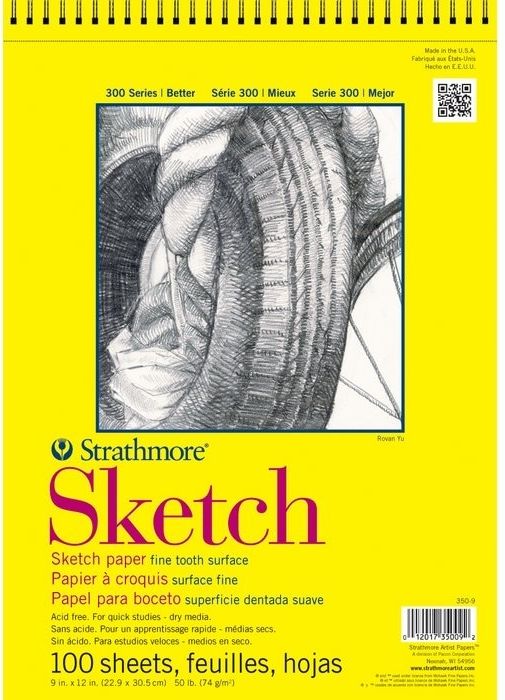 Intro: I have recently been looking at ATCs (artist trading cards)... perhaps creating my own? I do plan on creating them in multiple mediums and then assembling them to create a bigger work of art.
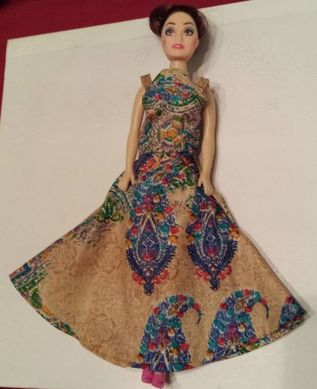
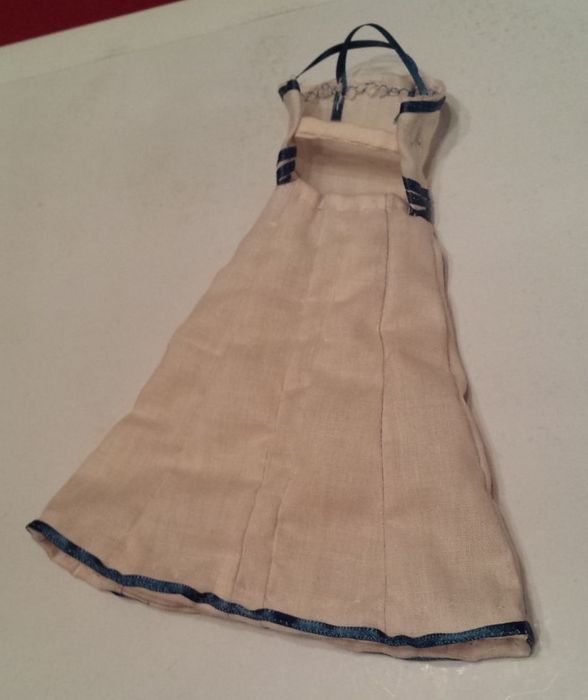
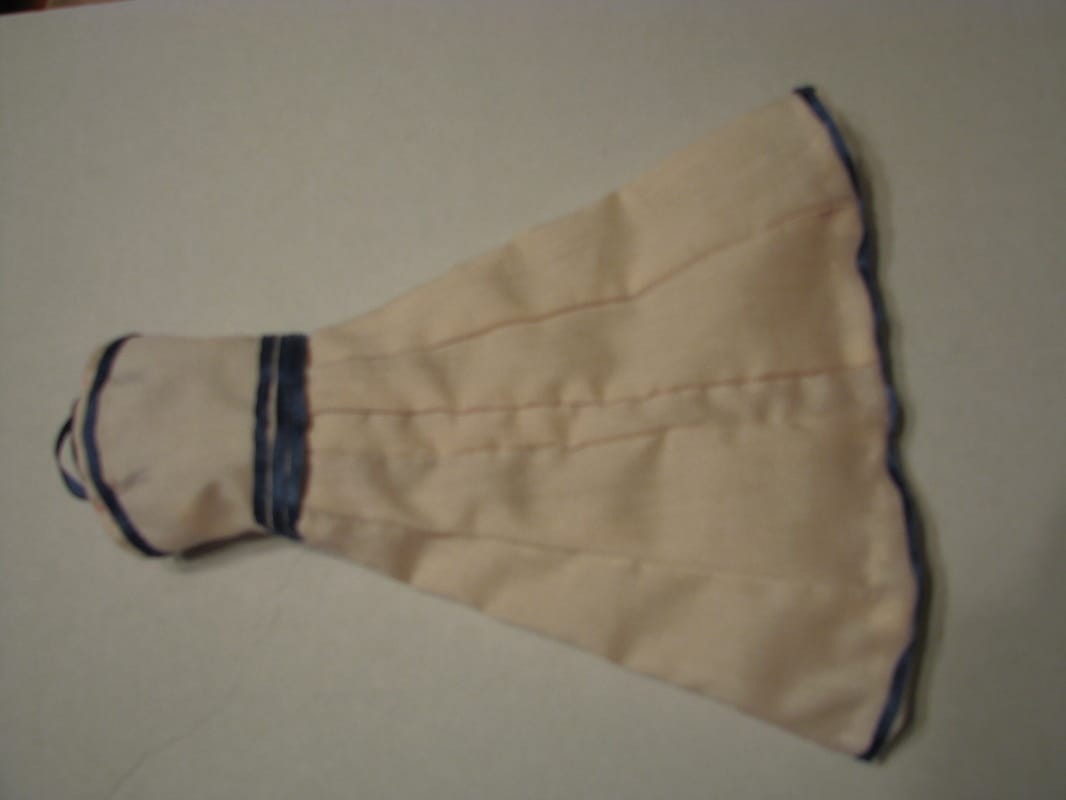
What are they: just as it sounds... trading cards for artists. Collectors use them to collect art of certain artists or various artworks surrounding a theme. An artist can use these cards to brainstorm, doodle, work on ideas, or even create mini versions of final works. Some use these to create 2D versions of something they'll make in 3D materials. Artists do exchange ATCs with each other, some sell them, some gift them...the possibilities are endless. What I am going to make: I am going to be creating 3D ATCs using either air dry clay or even polymer clay. I want to try and make previous paintings or sketches come alive by recreating them in 3D materials. I am going to assemble a collection of watercolor ATCs so you'll be seeing some of them in the future uploaded here as they are created. I do believe the polymer clay ATCs are considered Artist Tiles and not trading cards... but the whole idea is to use them with the same purpose as trading cards - collecting, exchanging, or gifting. Final thoughts: For now I am going to simply start by painting on watercolor paper, keeping the same size and then assemble my own set of cards once I have around 10. I am not going to purchase pre-cut cards.. I'll just cut them on my own. Once I decide that I am able to create enough art on such a small canvas then I'll purchase pre-cut cards. With that I'll also be creating a collection of ATCs focused on "studying." It'll include drawings done in pencils and pens about the human figure and natural objects (trees, birds, etc). You'll be seeing plenty of tests and discussions related to this topic in the future. Here's to a brand new year of creativity with hopefully a lot of new exciting projects... and a truck load of productivity! Intro: I figured it was a good idea to see what the umbrella cut dress would look like before blindly just creating one with kali (pleats). I wanted to make a simple one to see how the overall look was for a home-made dress in this cut (they all look good online but usually not in person). What I created: I went ahead and created another dress for the doll that I created in the first test. I took some parts from the same fabric that I was going to use to create as a trial dress for myself. I went ahead and first created a pattern on scrap paper... once I had a pattern that I was satisfied with I went ahead and transferred the pattern to fabric. It didn't take long to create this dress perhaps because I had learned basics from the first test. This second test went a lot smoother than the first time and definitely turned out nicer than the first one when completed. Final thoughts: It looks like that both types of dresses can be created - with pleats (kalis) or umbrella cut. The type of dress I want to create is now ultimately going to depend on the design I want. I am thinking about creating a few sketches on actual designs (decorations and embellishments) then I'll go from there. I'll post sketches once I have them completed. It'll be quite a process as I'll have to create the design keeping in mind that it'll have lights included. The dress still has to look nice without lights on...and with the lights on the lights still have to fit in with the design - wow!!! That's quite a headache that I already see coming.
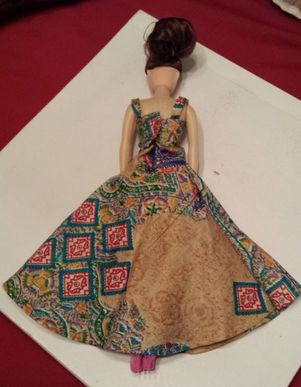
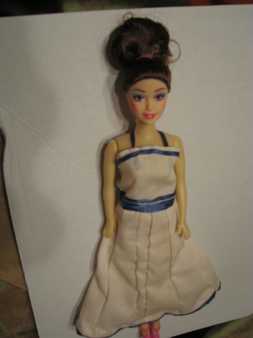 Intro: I am wanting to create a light-up dress in the next coming months. In order to make it I have to first learn how a dress is properly made as I have never made a full life-sized dress before. I have made miniature lehnga for dolls in the past but the dress type I am wanting to create is Anarkali. What I created: In my opinion it would be best if I learned how to put together a simple one first before diving into a more elaborate work. I decided to create a simple dress that would be made using pleats and not a full circle made of one piece. To test things out I made a small version for a doll first to make sure I understood how to evenly measure each pleat type. Typically the pleats (kali) are all the same in size and shape but I am going to make more of a traditional skirt as I do not want that many pleats for this test dress. The traditional method has the biggest pleat in the center (2 as one goes on the front and the secon on the back) with the side pleats being smaller in width. This doll dress currently has 5 pleats (sections of fabric) for the front and 5 for the back with a total of 10 sections creating a full circle. I am going to use this as a model to create a full size dress using more than 10 pleats if this is the method I end up choosing. The fabric I used for this doll dress was really the wrong type of fabric to be using for tests... lesson well learned. It was all I had available at the time in scraps. I originally created the top part of the dress (blouse section) in model of what I would create for a life size dress but I had to change that as it does not fit the doll due to the doll not having proper portions. So I re-created the blouse similar to the small one piece that she came with. Things worked out better that way. I know I am going to have to see if I can cut the circle skirt in proper size so I might create another mini dress to test that out... or just stick to newspaper. What I would change: I would pick a better fabric to make even this test with... It does not help when the fabric you are working with frays with the simplest touch. I would pick a bigger test subject, such as a bigger doll or even a child sized dress. Final thoughts: I am thinking after some research that I might end up using a combination of both skirt types. Using the pleats at the top for the main fabric then using the umbrella (circle cut) skirt for the lining with other materials in between to add form to the skirt. Has anyone attempted something of this scale before?
|
Author: RejiI used to be a digital artist but switched back to traditional art as I feel more connected with the art I create this way. Currently, I create art whenever I can for art trades and commissions. I have worked with clay (earth clay to modern forms like Polymer, Sculpey, even Air Dry clay) along with watercolors, acrylics, oil paints, pastels, charcoal, pen and pencil drawings, India ink, Chinese Colors, wires, felt fabric, yarn, weaving, basket making, and the list goes on and on. I am currently working on exploring nail art, make-up, dress making, scrapbooking, and small canvas art. Archives
April 2017
Categories
All
Copyright © Reji Randhawa | The Paradox Sketchbook. All rights reserved.
 All work on this blog is licensed under a Creative Commons Attribution-NonCommercial-NoDerivatives 4.0 International License. |
 RSS Feed
